I have a recurring problem. When someone asks me to make a really difficult cake my first instinct is to always confidently say “Yes, I can do that”. The most notorious instance of me doing this kind of thing was when I agreed to make a 20-sided die cake, and it was almost the end of me!
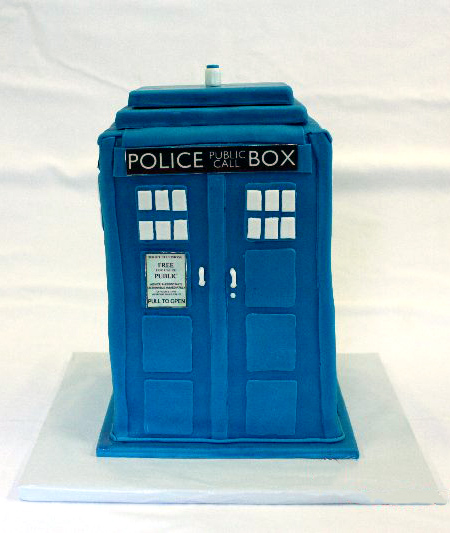 Well a few weeks ago I had another one of those times. I was asked to make the infamous Doctor Who TARDIS as a surprise groom’s cake. It definitely proved to be a bit more difficult a task than I originally thought, but I successfully delivered the cake below. In honor of the Dr. Who 50th anniversary I thought I would also share a little about how I built a Doctor Who TARDIS cake.
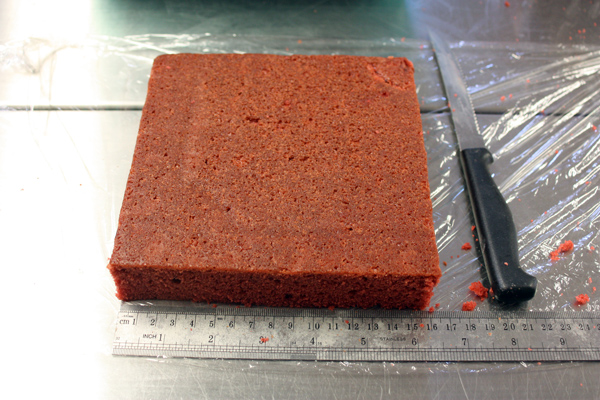
The cake needed to be about 40 servings so I did some research on what the dimensions of the actual Tardis are. I decided to make the cake a 6.5 inch square that is about 12 inches tall. To make enough cake and ensure that I could get nice clean edges I baked a 14 inch square as well as a 9 x13 inch rectangle. I wrapped the cakes in plastic wrap and chilled them in the fridge overnight to make them easier to cut. I then cut out six – 6.25 inch squares.
I started stacking the cake as though it were a three tiered wedding cake. I cut out a 6.5 inch square cake board for the very bottom. I filled and stacked the first two layers and then inserted 6 cookie sticks for supports. I cut a second cake cardboard to put on top, this time a 5.5 inch square so that it didn’t stick out past the cake at all.
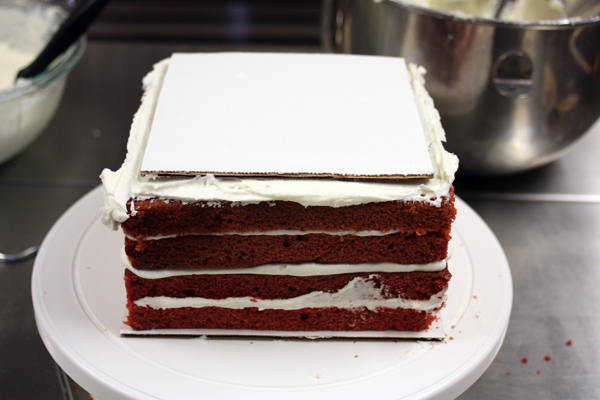 I filled and stacked the next two layers and inserted 4 cookie sticks in the middle tier (picture below is before I trimmed them).
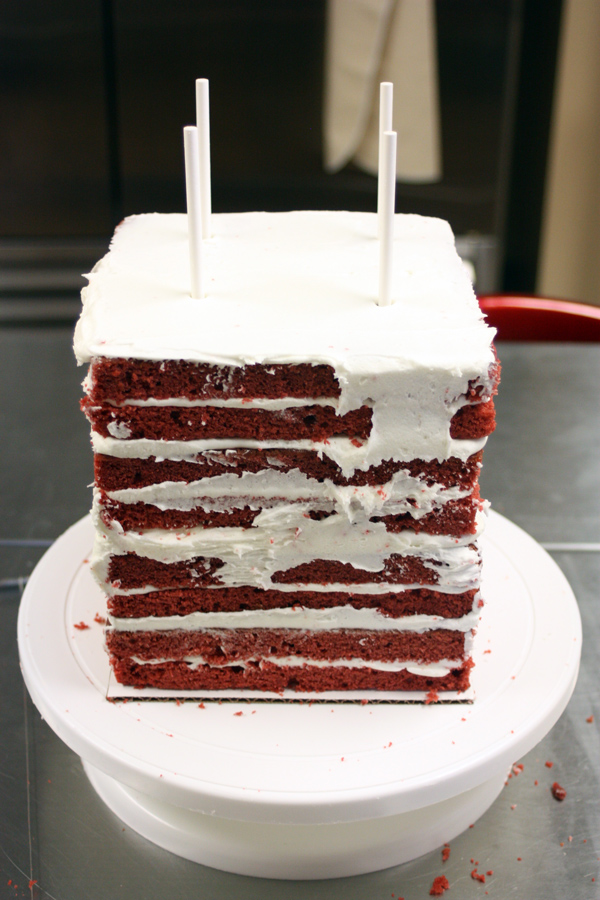 I filled and stacked the last two layers. I then inserted a sharpened dowel rod through the entire center of the cake. I will note that because I torted the cake layers (cut each in half and put filling in between) they kept shifting when I put the dowel in. I tried removing and reinserting the dowel a few times, but overall I think if I hadn’t torted the layers the cake would have been straighter than it was.
I left the dowel sticking out of the top so that I could also insert it directly into the base the cake was going on. I then frosted all the sides of the cake and put the whole thing in the fridge to set.
For the cake base I used double layer foam core glued together and covered in wilton fancy foil wrap. I cut out another 8 inch square of foam core and covered it with blue fondant.
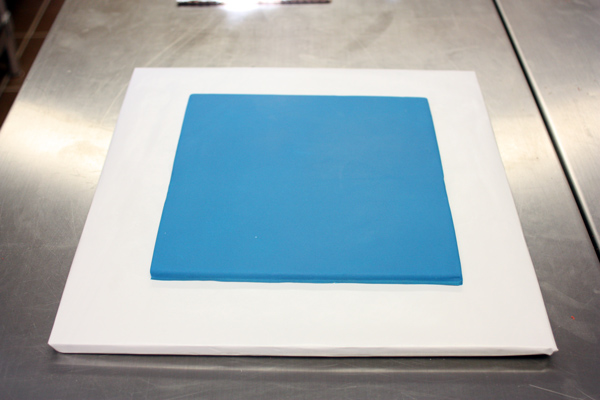 I stacked the frosted cake onto the blue base and pushed the dowel all the way through the three foam core layers. I then trimmed the dowel and covered each side of the cake in blue fondant. Blue fondant strips were used to cover all the edges. I cut out fondant rectangles in blue and white to create the windows that go on each side.
I used an edible image printer to make the “Police Call Box” and the “Pull to Open” signs. For the top I cut out 5.75 inch and a 5.25 inch square of foam core and covered each in blue fondant. I stacked them on top of the phone booth and added a fondant “light” to finish it off!

Leave a Reply
You must be logged in to post a comment.